How to use Audio Input Lock
Audio Input Lock keeps your Mac using the microphone or other audio input you choose. When another app, Control Center, or System Settings tries to switch the input, AirBuddy can restore your preferred device automatically.
Set up Audio Input Lock
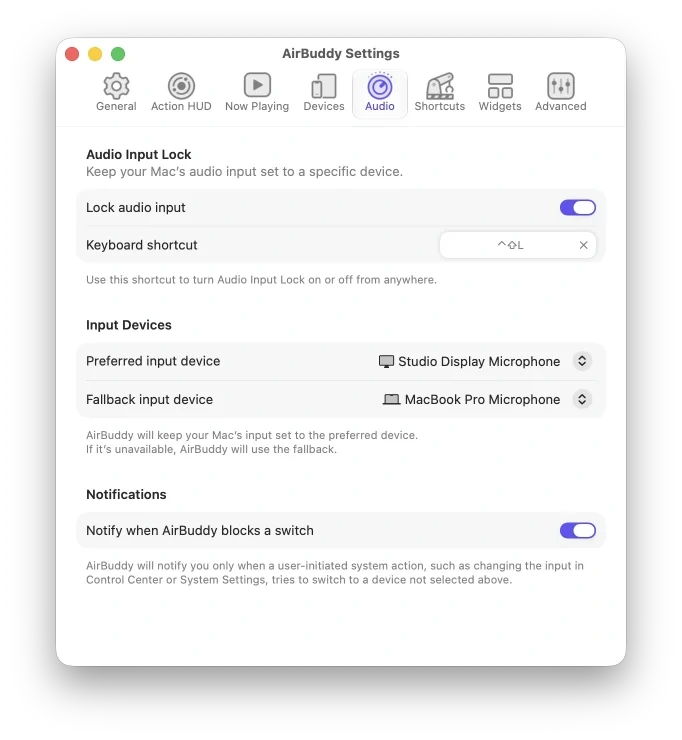
- Open AirBuddy settings.
- Select Audio.
- Turn on Lock audio input.
- Choose a Preferred input device.
- Optionally, choose a Fallback input device. AirBuddy uses it when the preferred input isn’t available.
You can select built-in microphones, audio interfaces, displays, headsets, and other input devices currently known to the Mac.
Turn the feature on or off quickly
Assign a keyboard shortcut in Audio settings to turn Audio Input Lock on or off from any app.
You can also use the Set Audio Input Lock action in Shortcuts. The action can turn the feature on or off and set the preferred input device, which is useful in personal automations.
Receive a notification when a switch is blocked
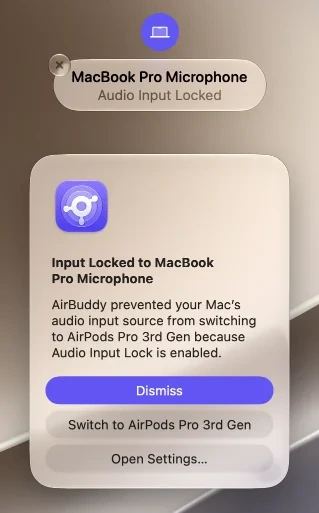
Turn on Notify when AirBuddy blocks a switch to show an Action HUD notification when a user-initiated action tries to select an input that isn’t one of your chosen devices.
AirBuddy doesn’t notify you for every automatic route change. The notification is intended for changes initiated through macOS controls, such as Control Center or System Settings. When you see an Audio Input Lock notification, clicking it shows a pop up where you can allow the audio input to be changed.